🛠️ Setup Guide for Security Labs
Introduction
Before starting our security labs, it’s essential to create a safe and isolated environment. Security labs often involve intentionally vulnerable applications, so we must ensure everything runs in a controlled space, without risking our personal systems or networks.
This is where virtualization comes in.
What is Virtualization?
Virtualization allows you to run multiple operating systems or applications on a single physical machine in an isolated manner. It enables the creation of virtual machines (VMs) or containers that behave like independent computers.
Why Use Virtualization in Security Labs?
- Isolation: Each lab runs in a controlled environment, minimizing risk to your host machine.
- Reproducibility: Quickly reset environments if something goes wrong.
- Flexibility: Run multiple operating systems and applications without interfering with your main system.
- Safety: Vulnerabilities and attacks remain contained.
Types of Virtualization
There are two main approaches we can use in our labs:
1. Virtual Machines (VMs)
- Emulates a full operating system (e.g., Ubuntu running inside Windows).
- Examples: VirtualBox, VMware, Hyper-V.
- Each VM has its own virtual hardware (CPU, memory, disk).
- Full isolation but resource-heavy.
2. Containers
- Lightweight and share the host’s operating system kernel.
- Faster startup and lower resource usage.
- Common tool: Docker.
- Ideal for spinning up databases, web apps, and vulnerable lab environments quickly.
What We’ll Use in Our Labs
For our labs, we will use containers (with Docker) to build our home lab environment, which includes:
- MySQL (database)
- phpMyAdmin (database management)
- PHP environment (demo hospital application)
Since Docker works best on Linux, Windows users will need a Linux environment first. There are two options:
-
Using a Linux VM
- Install a full Linux virtual machine (Ubuntu recommended).
- If you choose this option, you can find detailed installation guides here:
DevOps Course Repo
-
Using WSL (Windows Subsystem for Linux)
- WSL allows running Linux directly on Windows without a full VM.
- It is lighter and easier to set up than a VM.
- The following sections will guide you through installing WSL and preparing it for Docker.
WSL allows you to run a full Linux environment directly on Windows without the overhead of a traditional virtual machine. For our security labs, WSL provides a lightweight Linux environment to run Docker and containers.
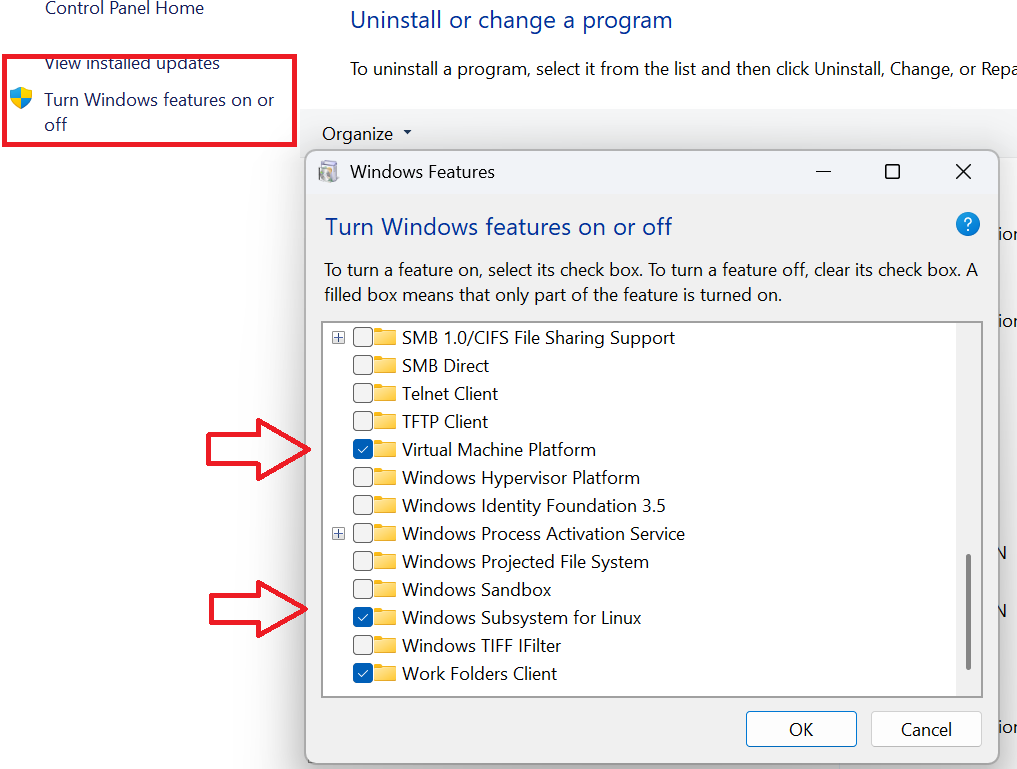
⚠️ Before installing Ubuntu from the Microsoft Store, you must enable WSL via Windows Features:
- Open Control Panel → Programs → Turn Windows features on or off.
- Check Windows Subsystem for Linux.
- Optionally, also check Virtual Machine Platform for WSL 2.
- Click OK and restart your computer if prompted.
- Check the installation

Step 1: Open Microsoft Store
- Click the Start menu and search for Microsoft Store.
- Open the Microsoft Store app.
Step 2: Search for Ubuntu
- In the search bar, type Ubuntu.
- Select the latest Ubuntu LTS version (recommended for stability, e.g., Ubuntu 22.04 LTS).
Step 3: Install Ubuntu
- Click the Install button.
- Wait for the installation to complete (this may take a few minutes depending on your internet speed).

Step 4: Launch Ubuntu
- Once installed, click Launch in the Microsoft Store or open Ubuntu from the Start menu.
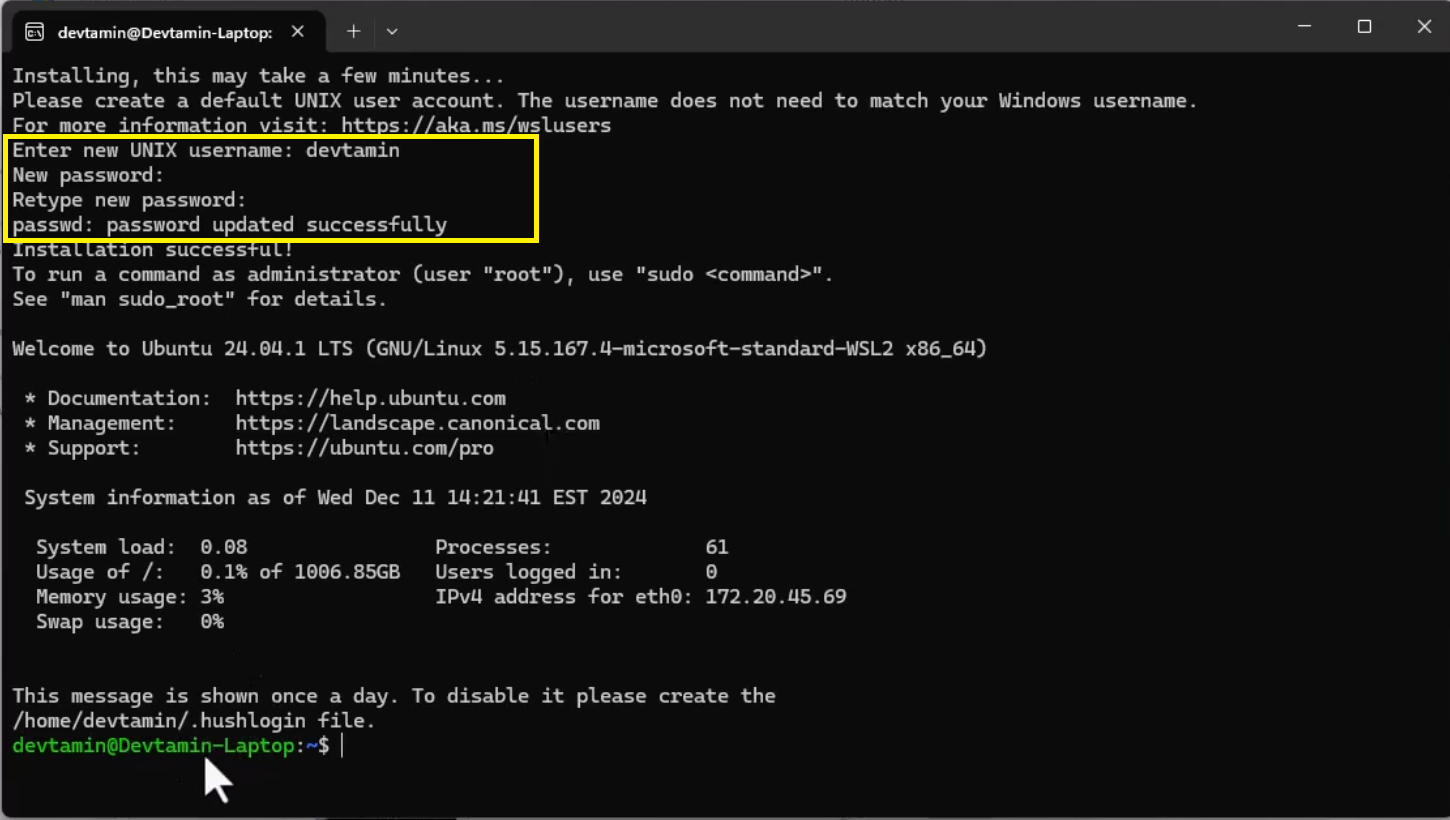
- On the first launch, the terminal will initialize the Linux environment.
- You will be prompted to create a Linux username and password.
Step 5: Verify Installation
- The Ubuntu terminal should now be ready. You can check the Linux kernel version by typing:
uname -a
- You should see output similar to:
Linux DESKTOP-XXXXX 5.15.90.1-microsoft-standard-WSL2 #1 SMP ...
Optionally, update your package lists:
sudo apt update && sudo apt upgrade -y
Installing Docker on Ubuntu
Step 1 — Update Packages
Update your existing list of packages:
sudo apt update
Step 2 — Install Prerequisite Packages
sudo apt install apt-transport-https ca-certificates curl software-properties-common
Step 3 — Add Docker GPG Key
curl -fsSL https://download.docker.com/linux/ubuntu/gpg | sudo gpg --dearmor -o /usr/share/keyrings/docker-archive-keyring.gpg
Step 4 — Add Docker Repository
echo "deb [arch=$(dpkg --print-architecture) signed-by=/usr/share/keyrings/docker-archive-keyring.gpg] https://download.docker.com/linux/ubuntu $(lsb_release -cs) stable" | sudo tee /etc/apt/sources.list.d/docker.list > /dev/null
Step 5 — Update Package List Again
Update your package list to include the new Docker repository:
sudo apt update
Step 6 — Install Docker
sudo apt install docker-ce
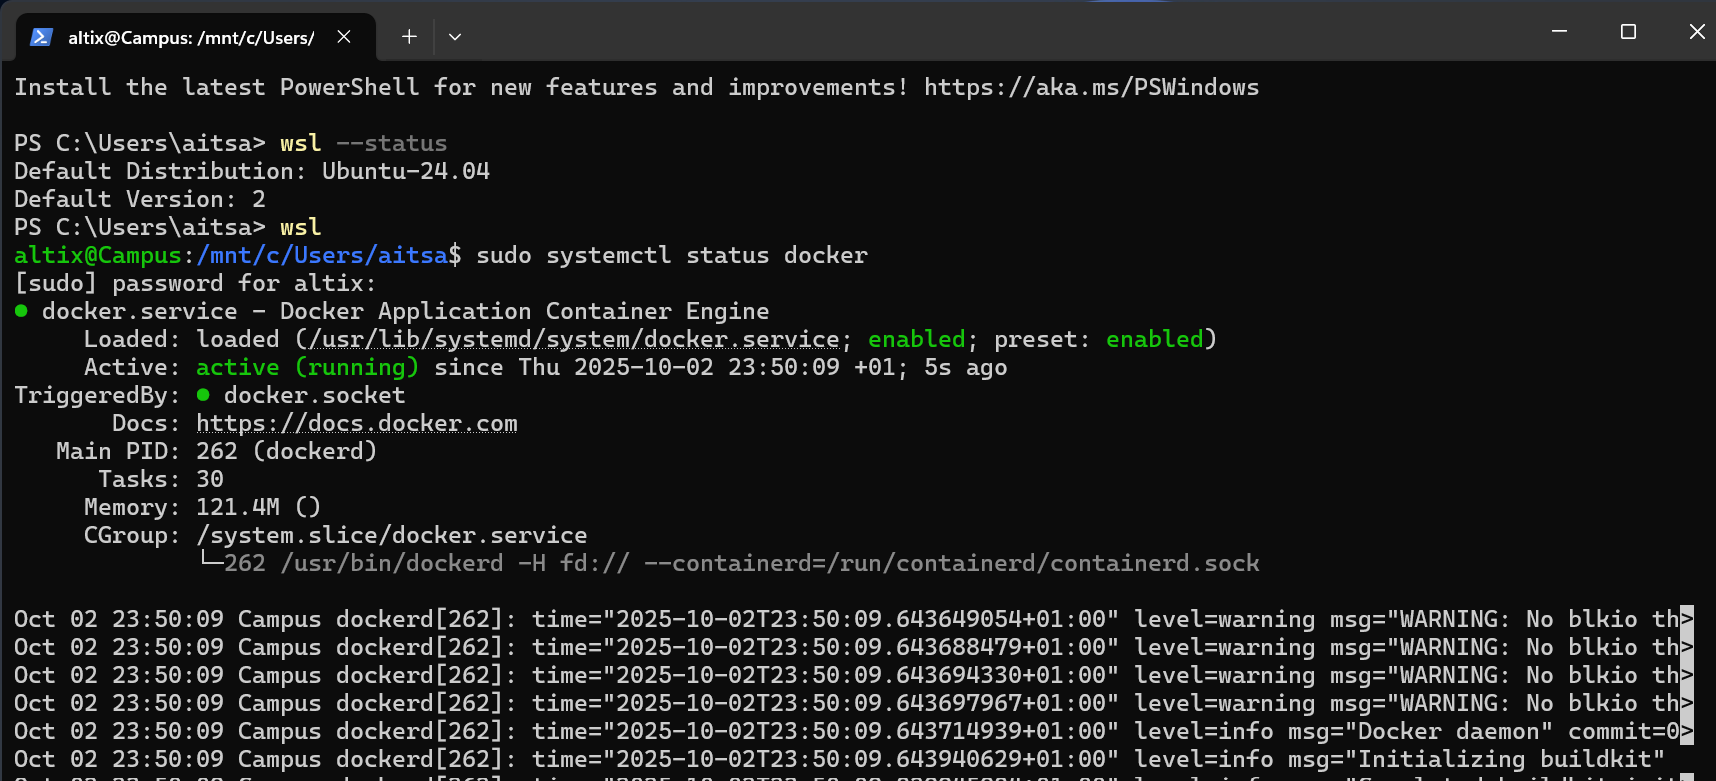
Step 7 — Verify Docker Installation
sudo systemctl status docker
You should see output similar to:
Install Docker Compose
Docker Compose is a tool for defining and managing multi-container Docker applications using a single YAML file (docker-compose.yml). It simplifies running, configuring, and linking multiple containers as a single service.
To install Docker Compose on Ubuntu:
sudo apt install docker-compose -y
🏥 Hospital Lab — Secure Development Practices
The Hospital Lab is a teaching web application designed to help students explore secure software development and web application best practices through realistic, hands-on scenarios.
This lab simulates a hospital management system where students can identify and fix common security vulnerabilities (such as SQL Injection, cryptographic failures, and insecure configurations) while also applying software engineering design patterns to improve maintainability and scalability.
🎯 Objectives
- Understand how insecure coding practices affect software security.
- Learn to apply secure development principles to real-world applications.
- Practice design patterns and refactoring techniques in PHP.
- Explore OWASP Top 10 vulnerabilities and how to mitigate them.
🔗 Repository
You can access the full project here:
https://github.com/mehdiaitsaid/hospital-lab-secure-dev-practices